 04-06-2021, 09:56 AM
|
#1
|
|
Registered User
Join Date: Apr 2021
Location: Southeast PA
Posts: 54
|
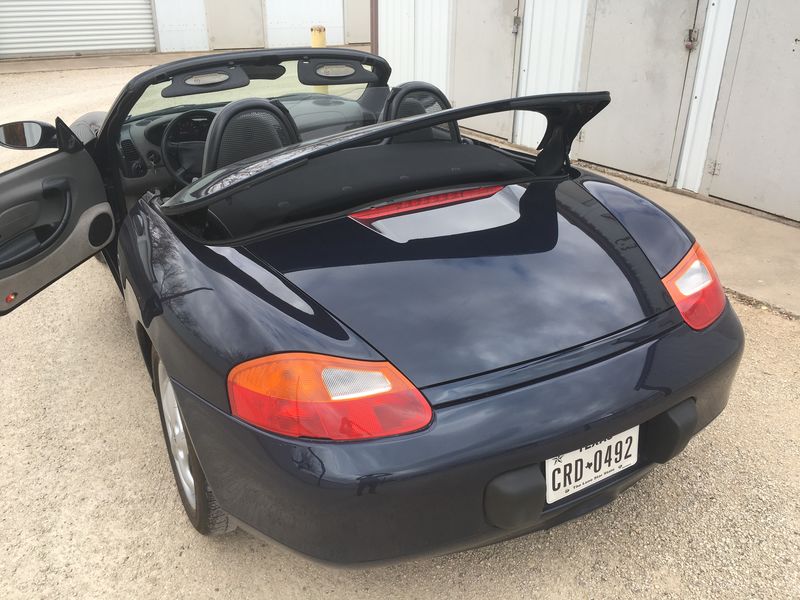
 99 Boxster Roof Off Tracks! Need help
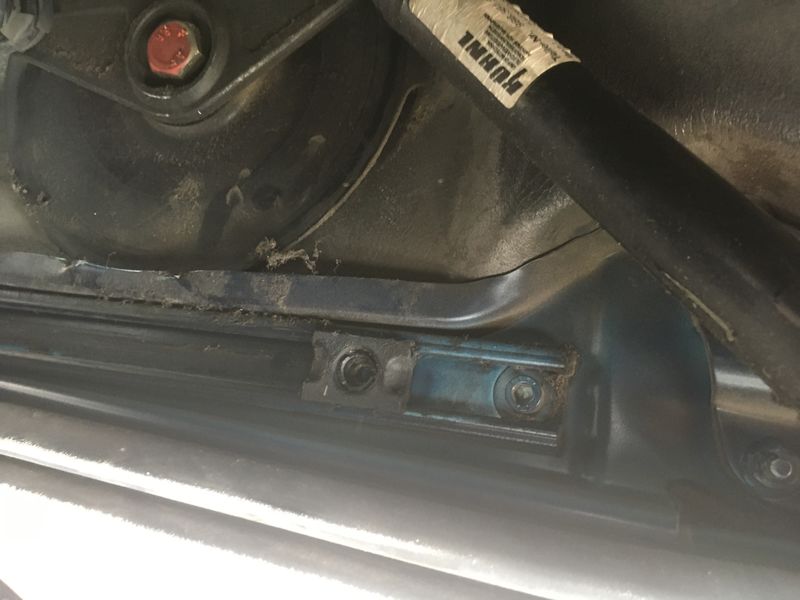
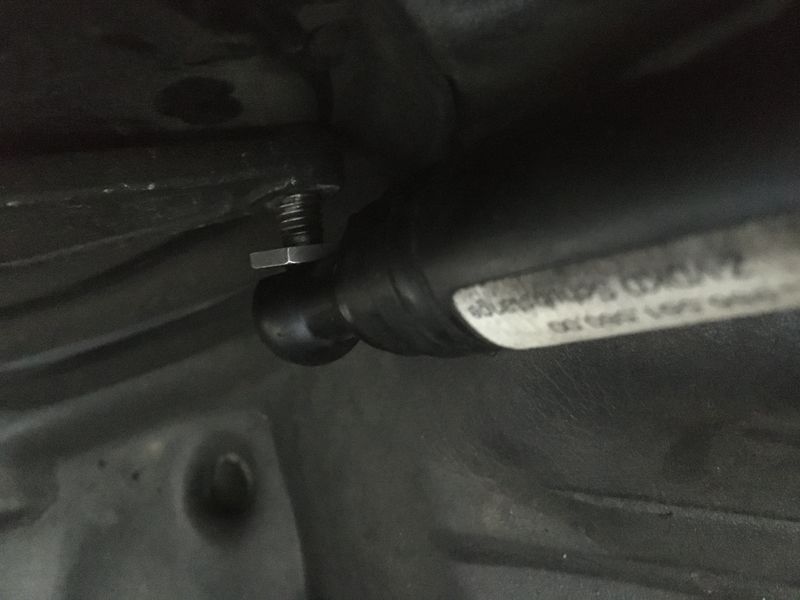
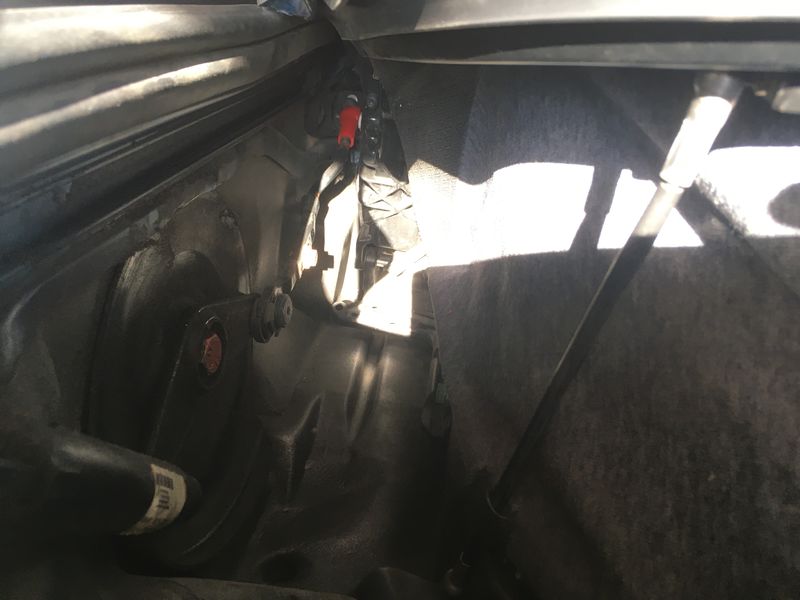
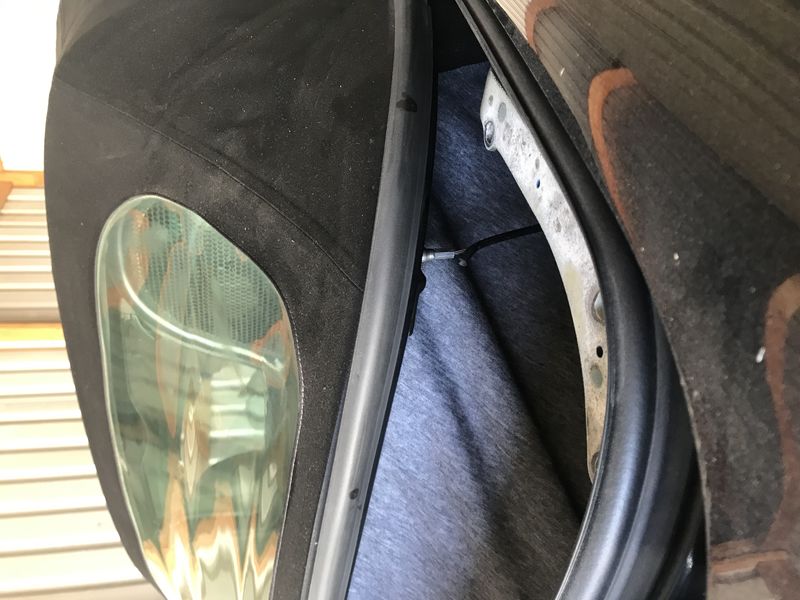
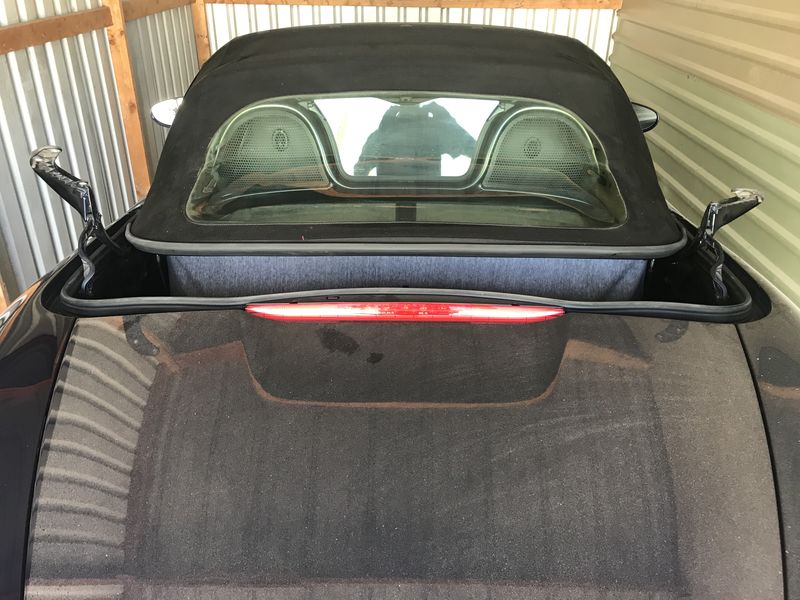
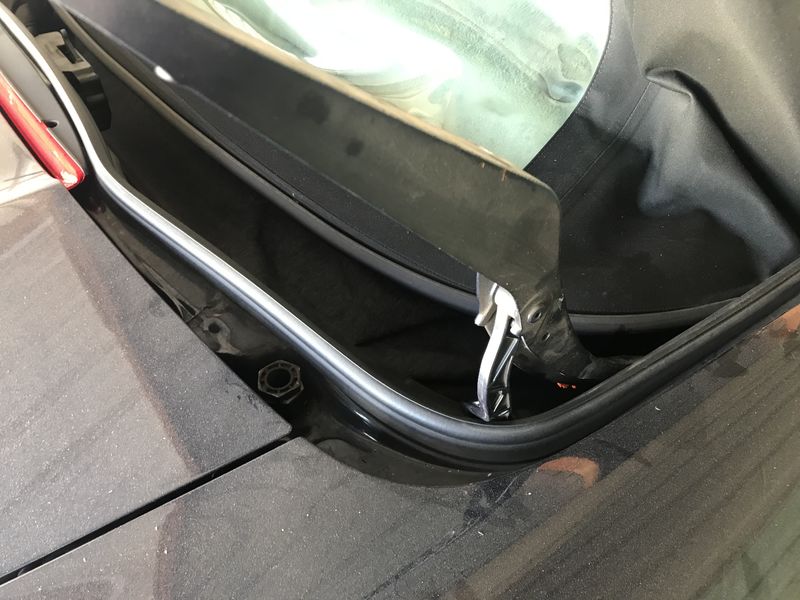
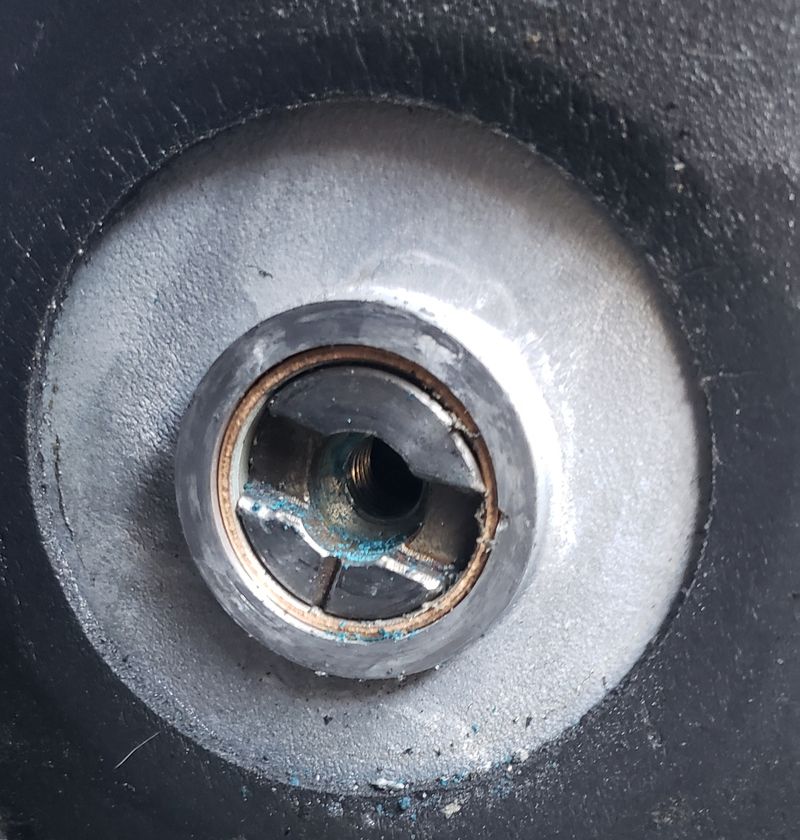
I'm new to the Boxster community and my fears of reliability came true this weekend when raising the convertible top. It appears the attachment bolt from the passenger side black actuator came out mid-operation (pic5) and somehow the ball socket on the driver side of the clamshell/ tonneau cover popped off the track(pic 3,4)?! Not sure the exact order of events, but after searching forums and youtube, I am unsure of how to proceed.
The top will still raise and lower evenly. Both lower connecting arms with plastic endpoints are intact (pic7). The threads seem to be intact where the passenger side hydraulic arm bolt attaches to the transmission assembly (I was able to get them to catch and left it hand tight for now- pic5,6).
If you have experience with these tops please advise and thank you!
1
2

3

4
5
6

7
|

|

|
|
04-06-2021, 05:35 PM
|
#2
|
|
Registered User
Join Date: Apr 2021
Location: Southeast PA
Posts: 54
|
I have things moving in the right direction or so I hope! I removed the clamshell which allowed me to pop back in the ball on the driver side where it belongs on the sliding track. With the top in maintenance position I reattached the bolt end of the black hydraulic arm on the passenger side with 17mm open ended wrench. Ops checked good.
When I went to replace the clamshell it was twisted, so I have to work on getting that sorted. Hopefully if that goes well everything will operate smoothly.
|
|
|
|
|
04-08-2021, 06:43 AM
|
#3
|
|
Registered User
Join Date: Oct 2018
Location: Redondo Beach
Posts: 46
|
Good luck! The mechanism back there isn't super complicated and, as you've found, it's pretty easy to figure out how everything works. While you're in there make sure you check all the mechanism connection points and try to figure out why it got loose in the first place. Torque up the bolts, lube the friction points, check the foam rain liner for any tears/holes, and make sure the drains are clear of debris.
My top came loose a few months ago, and when it did, it drove a metallic arm right through the foam liner...
Last edited by Boleador; 04-09-2021 at 07:53 AM.
|
|
|
|
|
04-08-2021, 07:07 AM
|
#4
|
|
Registered User
Join Date: Mar 2017
Location: Nahcotta
Posts: 329
|
986-561-577-01
to pop back in the ball on the driver side where it belongs on the sliding track
Consider replacing the top guide arm slide, and the bearing sleevs, 999-924-130-40
and the sfety clips 999-166-077-02
These are dirt cheap and woth the time.
Personal experience.
|

|
|
|
04-08-2021, 07:09 AM
|
#5
|
|
Registered User
Join Date: Mar 2017
Location: Nahcotta
Posts: 329
|
left out guide arm PN
986-561-577-01
|
|
|
|
|
04-08-2021, 08:46 AM
|
#6
|
|
Registered User
Join Date: Apr 2021
Location: Southeast PA
Posts: 54
|
Thanks for the replies! Yes, so far I have been impressed with how easy the Boxster is to work on. Good idea to replace those cheap plastic bits and hopefully avoid this from happening again. I have no idea why the passenger arm bolt would have loosened completely from the transmission assembly while the driver side is still torqued snugly.
|
|
|
|
|
04-10-2021, 10:26 AM
|
#7
|
|
Registered User
Join Date: Apr 2021
Location: Southeast PA
Posts: 54
|
Before asking a friend to come over and help straighten out the clamshell I took another look at things. I may need to make some adjustments.
Pics 8 & 9 show the clamshell attachment arms when the top is in nearly stowed position. The drivers side is about 1-2 inch higher than passenger side. Pic 10 shows the arms when the top is opened more.
Pics 11 & 12 show the top when it is near its service position. The arm on the driver side starts to dig into the weather stripping.
I've read up on the disconnecting the cables from the motor assembly and I assume that is what my next step should be? If so, can someone please clarify what side cable I should remove and what direction I should operate the top? I would go by trial and error, but I'm afraid of making things worse. When almost closed, the top looks to hitting the header roughly even. I wouldn't have noticed things were off if I was looking only at the top. Thank you!
8

9
10
11

12
|
|
|
|
|
04-12-2021, 01:53 PM
|
#8
|
|
Registered User
Join Date: May 2017
Posts: 1,180
|
Those arms are pretty pricey brand new. Might want to check e-bay, there are some pairs of them out there. Might be parting out a 2002 next week if so I'll have a post out there.
__________________
2000 Boxster Tiptronic
2003 Boxster
2003 996 C2 Cab
2002 996 (SOLD)
1986 944 (gone but missed)
|
|
|
|
|
04-13-2021, 03:35 AM
|
#9
|
|
Registered User
Join Date: Apr 2021
Location: Southeast PA
Posts: 54
|
Quote:
Originally Posted by Stl-986

Those arms are pretty pricey brand new. Might want to check e-bay, there are some pairs of them out there. Might be parting out a 2002 next week if so I'll have a post out there.
|
Thanks! I will let you know what I find
|
|
|
|
|
04-14-2021, 07:40 AM
|
#10
|
|
Registered User
Join Date: Apr 2021
Location: Southeast PA
Posts: 54
|
After a close look yesterday, the push rod on the driver side may be bent more than it should. Hard to tell for certain bc it is supposed to have a slight bend in it. I need to get a precise measurement of it and compare to pass. side.
It would make sense that a component on the driver side giving me trouble is bent, bc the top is synched and operating accordingly- yet clamshell support is still off. Also there is a lot of tension to the clamshell support on that side.

|
|
|
|
|
04-14-2021, 08:32 AM
|
#11
|
|
Motorist & Coffee Drinker
Join Date: Jul 2014
Location: Oklahoma
Posts: 3,918
|
Take a good look at the cast aluminum parts that mount and raise the clamshell. They look pretty good in your pictures, but the do tend to crack when uneven force is applied.
__________________
I am not an attorney, mechanic, or member of the clergy. Following any advice given in my posts is done at your own peril.
|
|
|
|
|
04-14-2021, 09:28 AM
|
#12
|
|
Motorist & Coffee Drinker
Join Date: Jul 2014
Location: Oklahoma
Posts: 3,918
|
I just watched your video. Good job showing what the issues are.
With all of the arms disconnected from the transmissions do they both move equally?
I don't like the method of measuring from a hard point to soft weather stripping. The strip may be worn, or not seated correctly, of measuring points may be skewed a bit. Look at this post that talks about aligning a notch:
Quote:
Originally Posted by CharlesE
I aligned the driver side notches. Here's a Pic

Passenger side was stuck like this
 |
The notch on the early top transmissions is easy to overlook, but very useful to get them both positioned the same.
This:
and This:
Bother me.
How well did they go back together? Are threads stripped? How did that ball mount get unscrewed from the arm? - it doesn't make sense to me. Is there rust/corrosion in the sockets?
I do have a complete set of parts for a '99 top (plus most of a 1998 and 2001 parts car) and can probably get them to you cheaper than eBay if you know what you need.
__________________
I am not an attorney, mechanic, or member of the clergy. Following any advice given in my posts is done at your own peril.
|
|
|
|
|
06-20-2021, 02:21 AM
|
#13
|
|
Registered User
Join Date: Apr 2021
Location: Southeast PA
Posts: 54
|
MrBen, thanks for the post. I had the transmission removed from its mounts the other day to check the mounting studs, but have yet to disassemble it. That could be my next step and probably should have done it while I had taken it that far.
I am well versed in the power drill/alignment procedures at this point. The main issue is that even when aligned by the notches on the trans or when measuring off a hard point- the driver side clamshell arm is hyperextending when it reaches its most rearward travel and will sit at a different elevation than passenger side during operation (pictured in last YouTube video).
|
|
|
|
|
06-20-2021, 07:46 AM
|
#14
|
|
Registered User
Join Date: Apr 2021
Location: Southeast PA
Posts: 54
|
Took a look into the transmission and it is still the original one from 1999 with a stout metal gear. Everything looked operational. I struggled to refit the transmission the other day and it gave me difficulty removing today, so I took a closer look at the metal studs from the body that it attaches to.
They are canted upward a decent amount, but hard to tell to what degree they should be from factory. I will start working on taking apart the functional passenger side to see if that gives me an idea. And if I come up empty, convert to manual operations, as that is the last idea and conceivable deviation that I can come up with.
https://www.youtube.com/watch?v=-J-Na1DyANI
Last edited by 986andmx5; 06-20-2021 at 07:49 AM.
|
|
|
|
|
06-21-2021, 08:56 AM
|
#15
|
|
Registered User
Join Date: Apr 2021
Location: Southeast PA
Posts: 54
|
The functional passenger side transmission easily slid off it's mounting studs and they measured level- unlike the studs on the driver side. I slid a deep 8mm socket over the driver side studs and used a 2x4 and mini sledge to hammer them until level. Measure, hit, measure so that I didn't over do it. In the end it was hard to align the 3 mounting points within a 3D space and it went back together much easier than it came apart, but the mounting studs were still not just right and the movement remained off.
I made the decision to call it quits and convert to manual ops. The cost-benefit on continuing to allocate time toward aligning he clamshell arms just wasn't adding up and the simplicity of manual operations will hopefully ensure reliability on long road trips far from my tools/spare parts. I still need to twist the clamshell back and hopefully will be good to go.
|
|
|
|
 Posting Rules
|
You may not post new threads
You may not post replies
You may not post attachments
You may not edit your posts
HTML code is On
|
|
|
All times are GMT -8. The time now is 02:45 AM.
| |


 2004 Porsche Boxster
 Parts Car, car parts
 Honda Del Sol(s)
 "Hers"
 My Original '99
 The 78 F350
 This
This That
That The S 2.5
 Other
Other
 Hybrid Mode


